CyBRICS CTF 2021 - Reverse - Paired
Type: CTF task
Platform: Windows x64
Category: Reverse
Idea: two executables interact with each other via PostMessageA
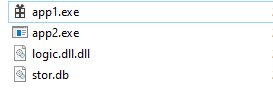
This is a reverse-task from CyBRICS CTF 2021 (https://ctftime.org/event/1306). We have 4 files: 2 executables, 1 dll, 1 custom-db.
app1.exe internals.
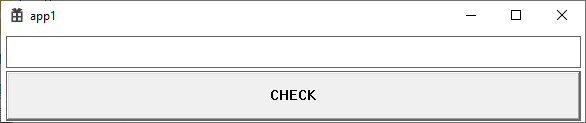
In general, we can ignore the database and the library. We don’t need to analyze it for solution. The main goal of this task is writing correct key in app1.exe.
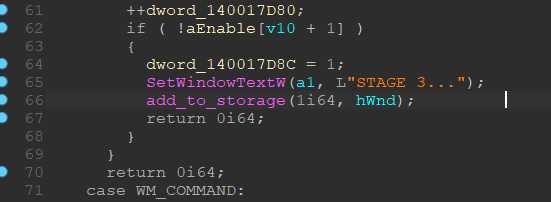
But we have some stages inside app1, which need to be passed before we enter flag. If we analyze the code in «app1.exe», it becomes clear that all these steps are needed for only one purpose - to put the application window handle in the database (image below, 66 line). To do this, you need to enter several passwords and go through certain stages, but you can do this simply by changing the program flow through the debugger.
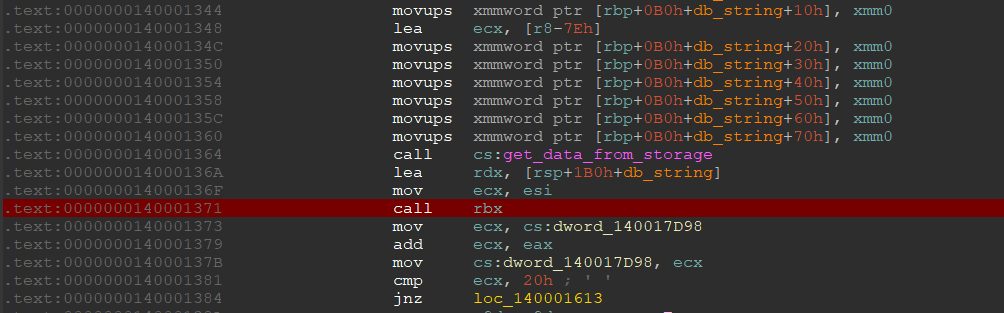
This is so that app2.exe can send requests and execute code through app1.exe. In app1.exe implements a handler for these requests (image below).
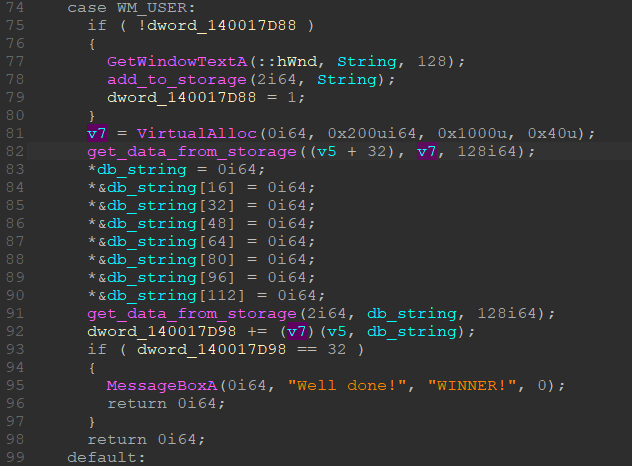
When this handler is called for the first time, we save our entered string to the database, after which we get the code from the database at some index and execute it with an argument in the form of our string. This is the whole logic of this executable file. Now we can analyze the second file.
app2.exe internals.
In the second executable files, we almost immediately find ourselves on the code that requests the window handler of the first application from the database.
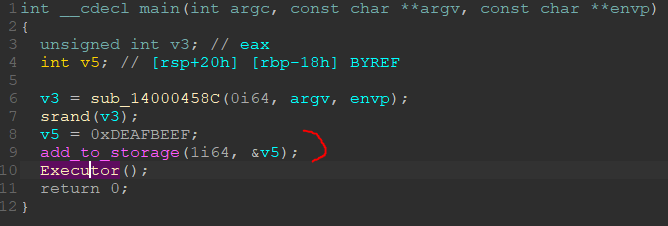
The highlighted code tries to write a value to the database at index 1, but if the value of our handler is already there, then it will not be overwritten. After that, we get into the function that does the rest of this task.
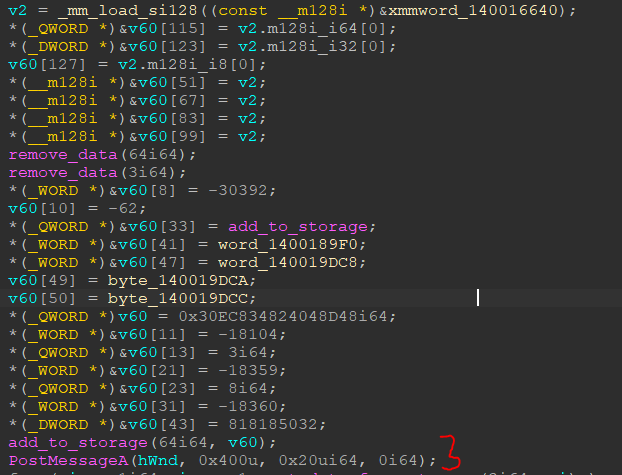
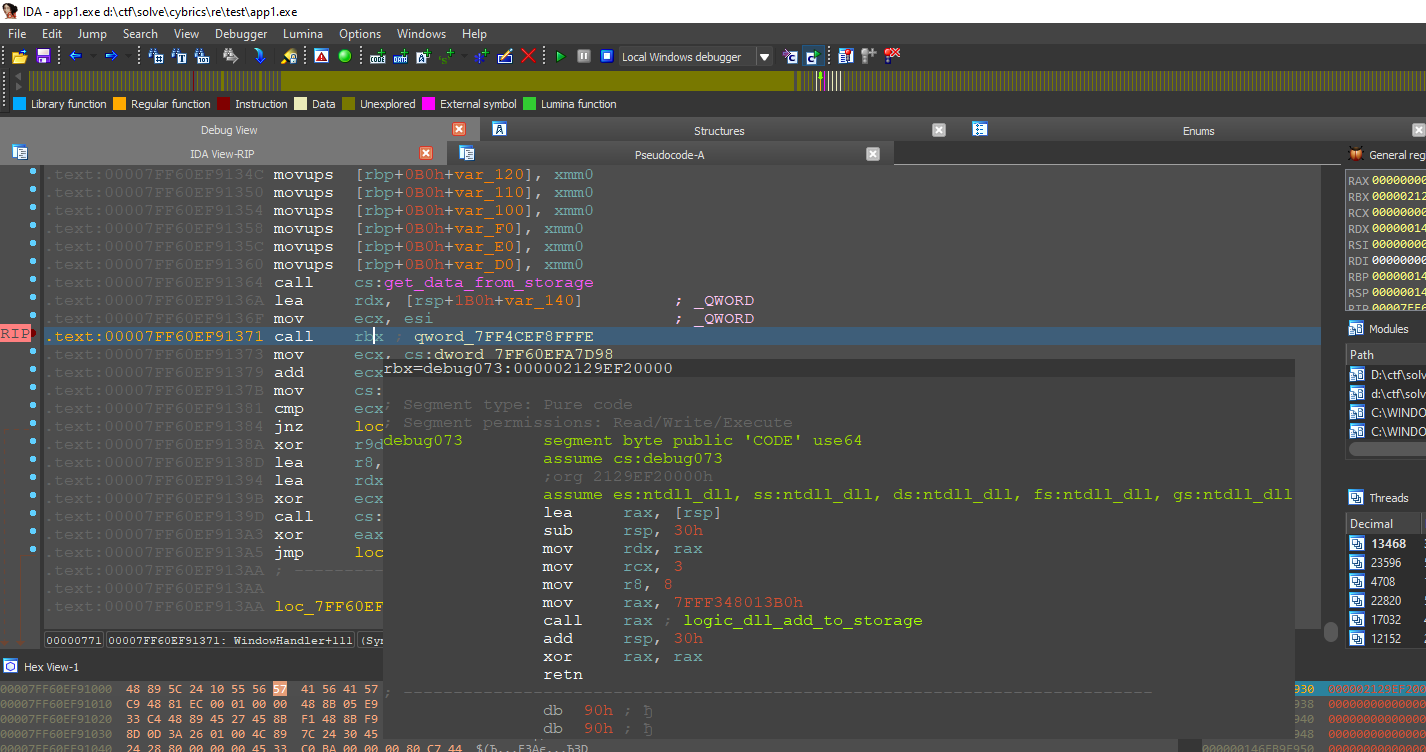
At the beginning of this function, we have the code that receives the window handler and then actively uses it by creating requests to execute the code (image below).
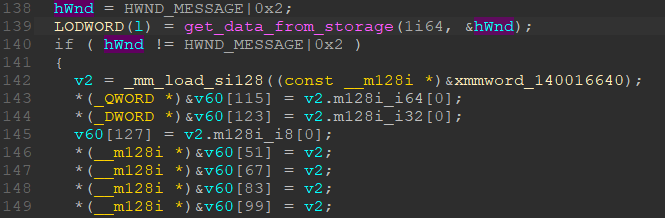
The idea behind code execution is pretty simple. We form a binary code in some array of 128 characters, after which we add it to the database at index 64 and send PostMessageA with the necessary arguments.
We can analyze this code by setting a breakpoint in the app1.exe.
We can look at the code simply by going to the address in the rbx register.
Thus, we can analyze pieces of code that are executed through this method. We will not describe in detail everything that happens in this function. Let's consider only the main points.
One of the first steps is to convert a string using the xor operation with byte 0x81.
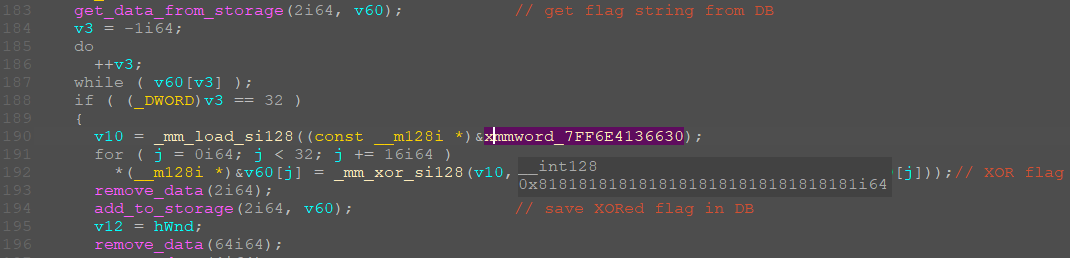
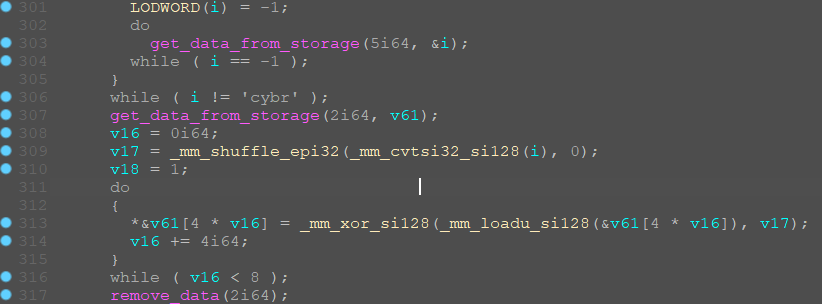
Next, the code allocates a certain area of memory where it copies the string and then adds the first 4 bytes to the base and retrieves them. These 4 bytes must be equal to "cybr" and a cyclic xor of our flag (which has already passed the first transformation) is also performed with them.
Thus, our string has now gone through 2 xor stages:
-
in a loop with byte 0x81
-
in a loop with the string "rbyc"
After that, the really fun part begins. Namely, a virtual machine.
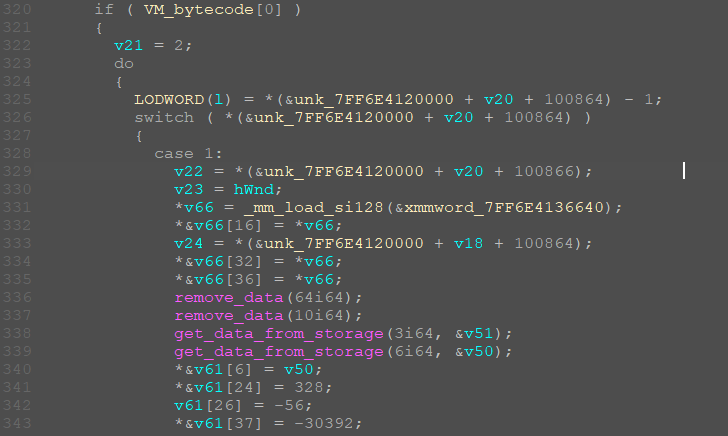
We have some bytecode and command handlers, 10 commands in total. This bytecode has instructions of various lengths and is executed in exactly the same way as the previous code. I will not describe in detail what each handler does, because that would greatly increase the size of the article.
The main thing to understand is that all handlers are fairly easily parsed in the manner shown above. We just put a breakpoint for each handler in app2 and a breakpoint for calling the code in app1.
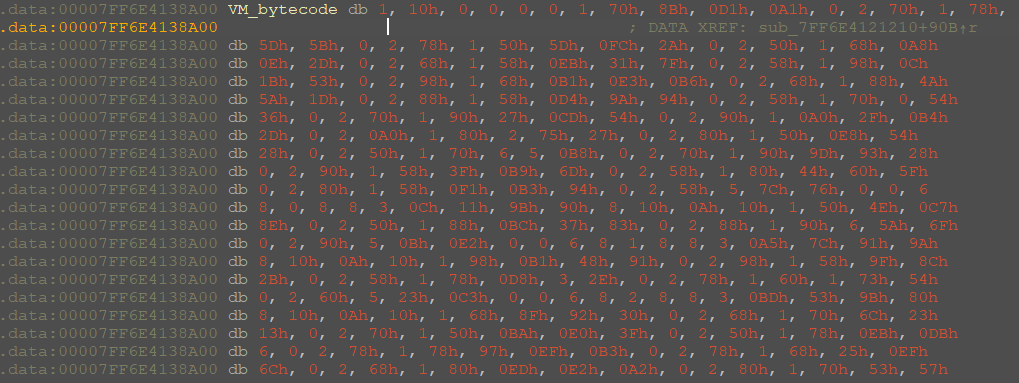
The bytecode itself looks like this (image below)
Despite the large amount of this bytecode, it does not do much useful work. In fact, all that this bytecode does is placing the next part of the flag in the 4-byte format into the base memory, adding a certain number (taken from the bytecode) to this part and comparing it with the constants in the bytecode.
All this is done with just a couple of commands, highlighted in the figure below.

Bytecode: 0x5 ARGS: 0x7c 0x76 0x00 0x00 – add dword (0x0000767c) in memory
Bytecode: 0x6 ARGS: 0x8 0x00 -> get part of flag with idx 0 and set to DB idx 7
Bytecode: 0x8 ARGS: 0x8 -> add to flag part value from memory and save to db idx 7 (<flag-part> + 0x767c)
Bytecode: 0x3 ARGS: 0x0c 0x11 0x9b 0x90 -> compare value from DB idx 7 with dword 0x909b110c.
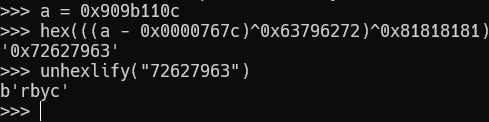
If we try to perform operations in the opposite direction for this number (0x909b110c), we get the following.
Now let's just get all such patterns out of the bytecode and parse it.
from binascii import unhexlify
import struct

u32 = lambda x : struct.unpack("<L", x)[0]
p32 = lambda x : struct.pack("<L", x)

bc = unhexlify("") # bytecode
idx = bc.find(b'\x08\x08\x03')
res = b''
j = 0

def xor(val, off):
    a = p32(val)
    res = b''
    key = b'rbyc'
    for i in range(len(a)):
        res += bytes([a[i] ^ key[(off+i)%4] ^ 0x81])
    return res[0]

while idx != -1:
    correct_dword = u32(bc[idx+3:idx+7])
    sub_part = u32(bc[idx-7:idx-3])
    bc = bc[idx+3:]
    idx = bc.find(b"\x08\x08\x03")

    value = correct_dword - sub_part
    res += bytes([xor(value, j)])
    j += 1

print(res)
Now, let's just run our script.

Summary: It was a pretty interesting task and I really like the concept of such reverse engineering tasks.